Create a donation form
Build the page your donors give through, from naming it to publishing it.
A donation form is the funnel a donor moves through: choose an amount, enter their details, pay, and see a thank-you. This page gets you from nothing to a live form.
Before you start: you need permission to create forms, and payments connected before the form can take money. You'll also need a campaign to link it to.
Create the form
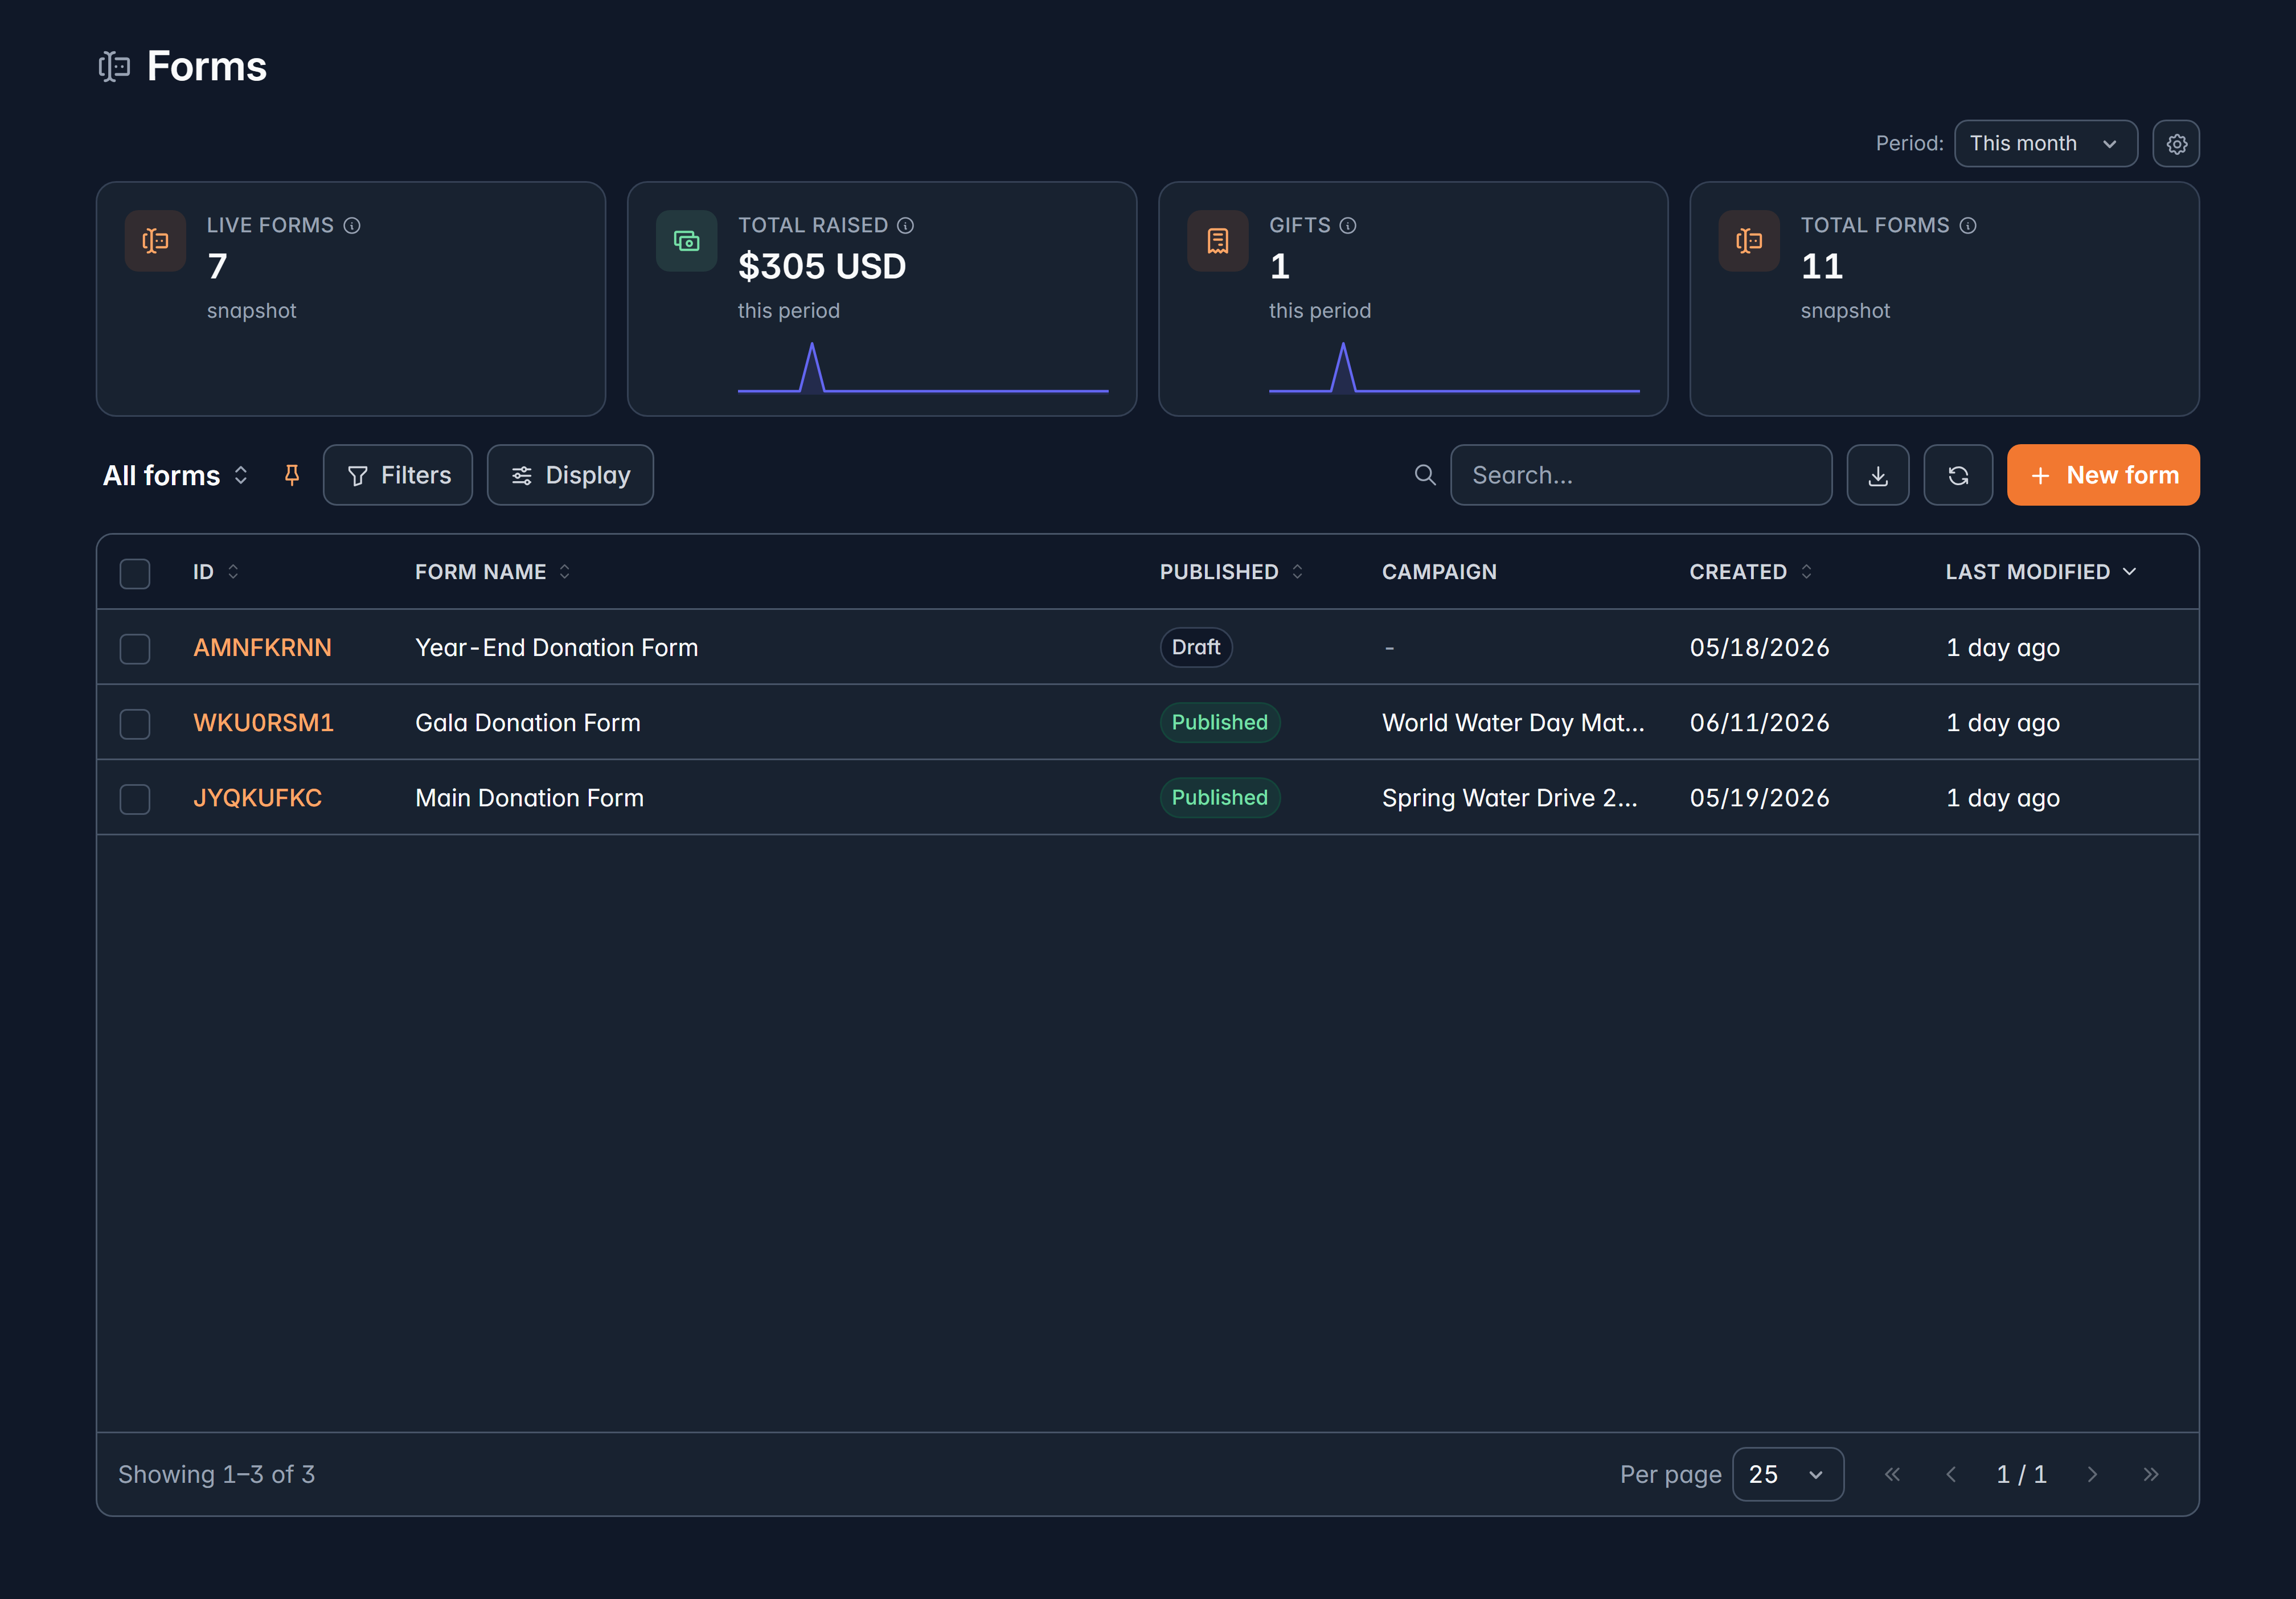
Fundraising > Giving Forms, then New form
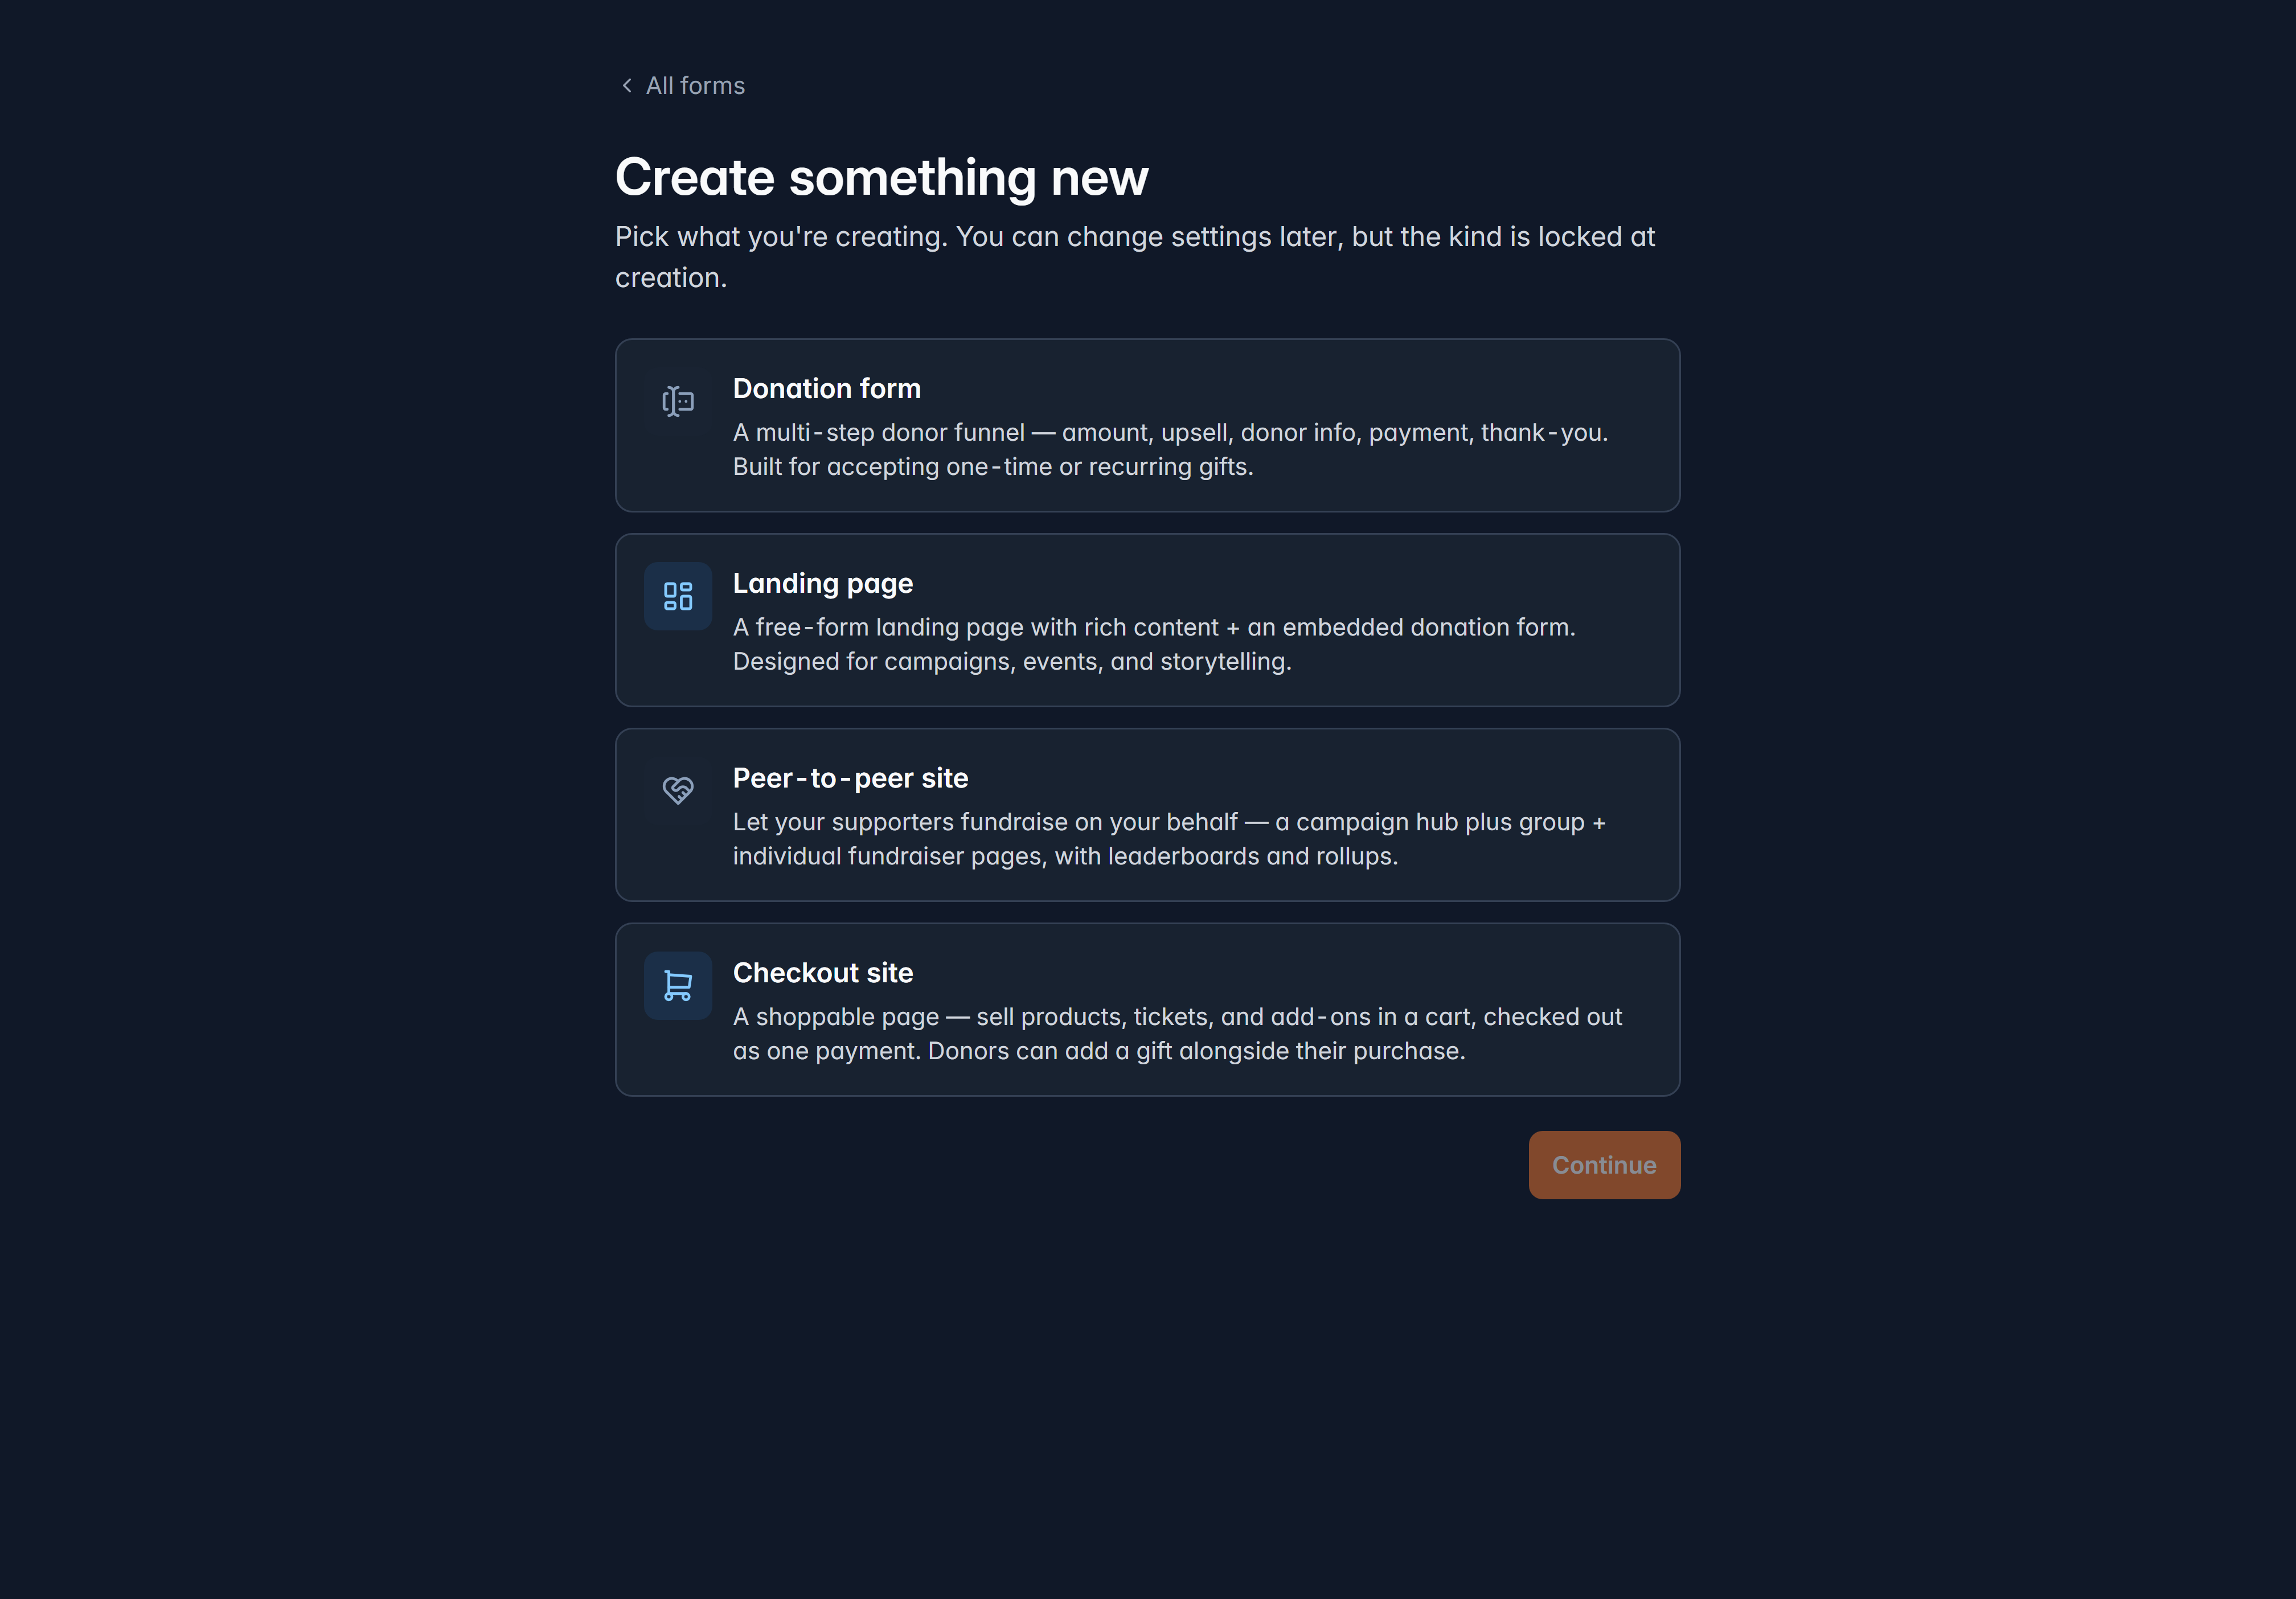
Givable asks what you're creating. Choose Donation form.
The other options here are landing pages, peer-to-peer sites and gift catalogs. The kind is locked once created, so pick deliberately.
Name it and pick a campaign
The Form name is internal, unless you use it as the form's title. Campaign is required: it's what links this form's gifts to your reporting.
A Description is optional, and only your team sees it.
Create form
You land straight in the builder.
If your organization has a parent that shares forms, you'll also see Copy from parent organization. That copies their content and settings into a form you own, and it's independent from then on: their later edits don't reach your copy.
The builder
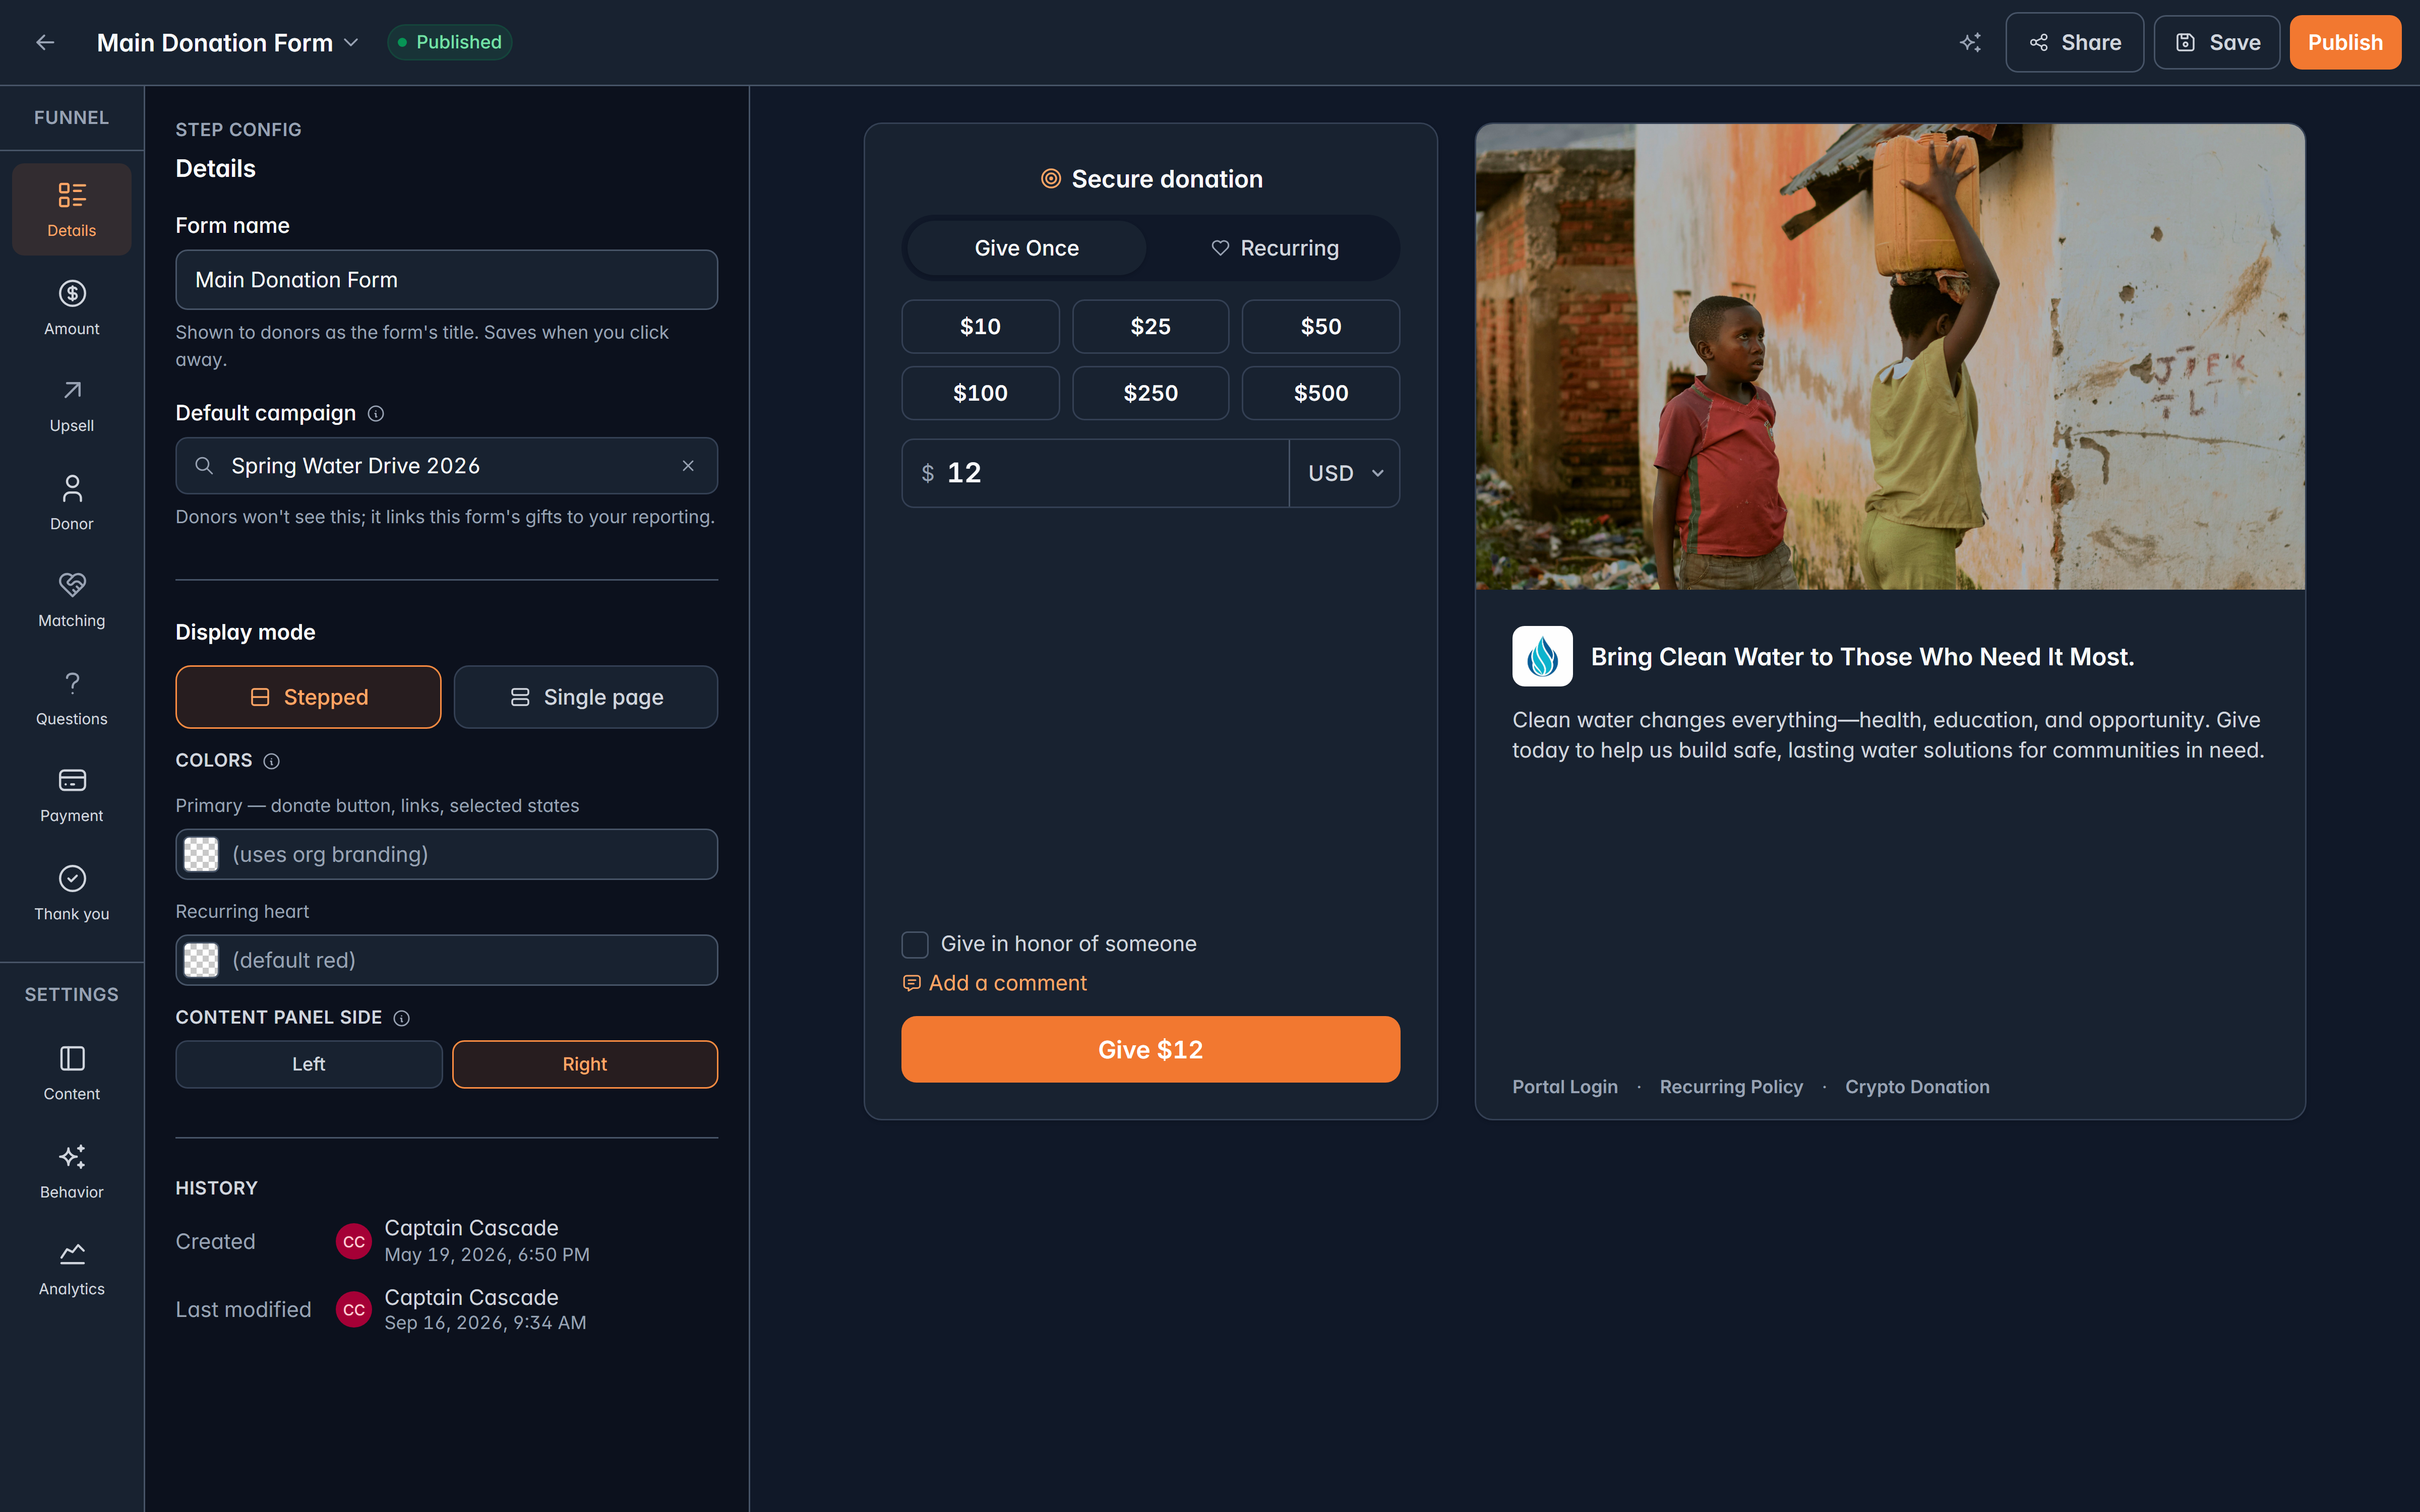
Three panes: the steps down the left, the settings for the selected step in the middle, and a live preview of what donors see on the right. Click through the preview to walk the funnel as a donor would.
The steps are fixed, in order: Details, Amount, Upsell, Donor, Matching (when available), Questions, Payment and Thank you. Below them sit three form-wide settings: Content, Behavior and Analytics.
You can't add, remove or reorder steps, which keeps every Givable form working the way donors expect. You can turn the upsell and matching steps off, and the questions step disappears when you haven't placed any questions.
What each step controls is covered in What each form step does.
Choose a layout
On the Details step, Display mode picks between:
- Stepped: one thing at a time. Best on phones and for longer forms.
- Single page: everything at once. Best when you only ask for a little.
You can also set the form's Primary color and which side the content panel sits on. Leave the colors blank to inherit your organization's branding.
On phones
On a phone your form fills the screen edge to edge, and On phones chooses how your story shows above it:
- Form first (the default, and the one we recommend): a short version of your story (a slim image, your title, the progress bar if you have a goal, and the first two or three lines) with a Read more button, and the giving form starts on the first screen. Once the donor moves past the amount, the story shrinks to a slim bar. If they scroll away from the form, a Donate button appears at the bottom of the screen and brings them straight back to it.
- Story first: your whole story first, with a Donate button pinned to the bottom of the screen that opens the form full screen.
A form opened from a button on your website (a pop-up) always shows the form first: tapping Donate already says the donor wants to give. Computers and tablets are not affected by this setting.
On every step, the step's buttons (such as Continue to payment, or Keep my one-time gift on the upsell) sit at the bottom of the screen, and the step scrolls above them. While the donor types, they move back below the fields so the keyboard never hides what they're typing. A pop-up shows your form's name at the top, from Giving Form name in the form's details.
Keep the first lines of your message strong: on a phone they're what donors read before deciding to give.
Save, publish, and change safely
Three states, shown at the top of the builder:
| State | Meaning |
|---|---|
| Draft | Not live. Donors can't reach it |
| Published | Live and taking gifts |
| Changes not live | Live, with saved edits donors aren't seeing yet |
Save stores your work without touching what donors see. Publish makes it live. When a form is already live, the button becomes Publish changes, so you can work on a live form without fear: nothing reaches donors until you say so.
Unpublish takes the form down, and donors can no longer reach it.
Version history
Select the form's name at the top of the builder to see every saved version, who saved it and when, with the live one marked.
Choosing an older version loads it into the editor as an unsaved draft. Nothing changes for donors until you save or publish it, so you can look at an old version safely.
Before a big rewrite, hit Save first. That gives you a version to come back to.
Test before you promote it
Publish, then give a small amount yourself and refund it. You'll see exactly what a donor sees, including the receipt, and you'll know the whole path works before your appeal goes out.
Related
What each form step does
Amounts, donor details, payment and thank-you.
Share and embed your form
Links, QR codes and putting it on your website.
Still stuck?
We're here for you, and no question is too small. Tell us what you were trying to do and what happened, and we'll help you get it sorted.